Archive for September, 2012

Finished!

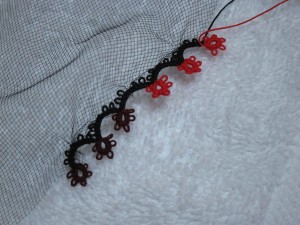
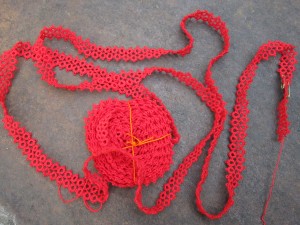
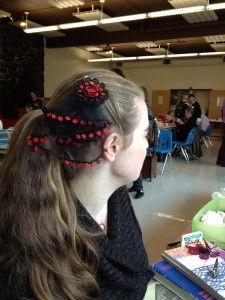
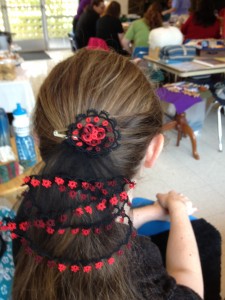
I finished the red and black veil yesterday.  This is the one in which I was attaching the lace to the tulle while tatting and it worked really well.  I’m very pleased with the way it came out.  On Friday night though I had finished all the tatting and just had to put the piece together and I didn’t think it was going to come out very nice, but when I put it together on Saturday morning it did!

One thing I’m going to have to play around with is what hair clip to use and how to attach it.  For this one I used my standard clip and pointed it sideways (it’s not adjustable) because I typically wear them on my right side.  (I like the way it looks in the back over a ponytail too.)

Next on the veil list is to make the flower to with the purple one.  I also like this one so much that I started on another one.  The same black tulle with a larger edging of variegated blue with black.  I’m modifying the pattern a little to make it curve around in a circle so I hope it turns out.  It’s a much wider edging so is taking quite a while to go around.  It’d be a shame to get halfway around the tulle and determine it doesn’t work.
I am debating about offering it as a class at Shuttlebirds.  Wondering if I’ll have enough time between now and then to practice and learn enough to teach it or wait until 2014.  2014!  Planning classes for 2014.  Can you believe it’s almost 2013!?!
Comments (4)

Second Attempt at Working with Tulle

This is my second attempt at attaching the tatting to the tulle and it’s working much better.

One of the exciting things about this attempt is how I found the actual tulle that I’m using.  To make a veil you start with a circular piece of tulle.  When I took the veil making class at Pacific Fabrics I asked the teacher to cut a couple extra pieces for me to make these mini veils.  It was quite a while later that I realized that they sell these little circular pieces of tulle pre-cut and packaged in the wedding section for making gift bags/party favors.

I picked up a package of black ones to try this out on and it’s working quite well so far.  More to come for sure.

Leave a Comment

First Attempt at Working with Tulle

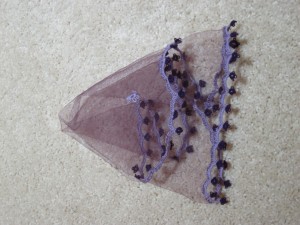
Quite a while ago I took a veil making class at the Pacific Fabrics store in Northgate because I wanted to play around with tulle and figuring out how to attach the tatting to it.  My idea was to make little mini-veils in different colors.  While I was there I asked the teacher to cut out a couple piece of tulle in different colors to try out these mini-veils.  This is the first of them.

For this one I did the tatting first and then sewed it on the tulle.  Didn’t work quite as well as I would have hoped.  It was hard to figure out exactly how much tatting I needed to go around the tulle and so I started the sewing while it was still attached to the ball and shuttle and that was sort of awkward.

I finally finished attaching the tatting last week and as I was doing it discovered that I had overshot and made it too long for the tulle.  Took a bit of retro-tatting to get it right, but got it there eventually.  I’m going to add a couple other little flowers to the main part of the tulle, and then figure out a way to attach it to a barrette.

I’ve started another one that I’m attaching to the tulle as I’m tatting it and it’s working much better.  It’s the same pattern, but I’m just joining directly to the tulle.  I only just started so I’m not very far along, but I’ll try to take some pictures tomorrow.


Comments (2)

More Unfinished Projects

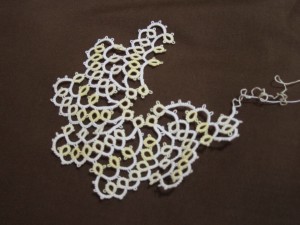
This is the unfinished version of Mary Konior’s Spinning Wheel that I started last week in yellow and white.  I like the way it’s turning out.  I just ran out of the yellow thread on the shuttle and haven’t gotten around to finishing it off yet.

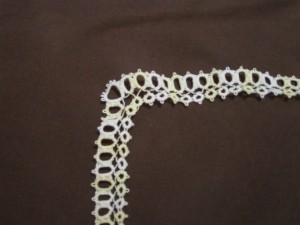
The yellow of this project was the left over from another piece.  An edging around a handkerchief that I’ve been working on for a while and finally finished the tatting for.  I didn’t realize quite how much tatting there was to a get around a handkerchief!

This handkerchief has been on my list of projects to finish for a while.  Now that the tatting is finished the next step is to get it actually sewn onto the handkerchief.  The pattern is from one of the Priscilla books.  It took me a while and quite a few attempts to figure out how to do the corner.  It’s always nice to find a single shuttle pattern that I like.


Comments (1)

Following a Pattern

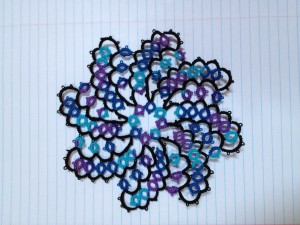
This is actually last week’s project and I finished it then, but it’s been a busy weekend and I’m just getting around to writing about it.  A couple weeks ago I picked up a copy of Mary Konior’s Tatting with Visual Patterns on Ebay.  Last week I tatted up this version of the Spinning Wheel pattern.  This is one of the few full-multicolored threads I like and I think it works especially well with the black.  I like the stain glass look of the combination.

This is actually the second version of this pattern I did.  I also started one in white and a variegated yellow in size 20, but ran out of thread on the shuttle and haven’t gone back to finish it off.  Perhaps that will be my project to finish for this week.

It was nice to simply follow a pattern without having to make adjustments or retat or rewrite anything.  A nice bit of change from working on the Priscilla books other older patterns.

I had been planning to go to Camp Wannatat this weekend, but it’s getting close to exam time (two weeks from today!) and I managed to twist my ankle this weekend while coming down the stairs.  It’s feeling much better now, but it sort of messed up my study schedule and I’m not sure now that I’ll be able to go.  We’ll see how things are in a couple days, but now I’m thinking I’ll have to skip it.


Comments (3)

A Tatted Doodle

Sometimes while reviewing my accounting videos I’ll work on a piece of tatting to keep me from getting distracted.  If I’m not doing something with my hands (either tatting or taking notes) I tend to find myself checking email or rearranging things on my desk and not fully paying attention to the videos.

Of course, it can’t be a very complicated piece of tatting since the whole point is not to get distract.  This garland has been perfect.  It’s a simple single-shuttle edging with rings of 3-3-3-3.  No need to think at all so I can keep my hands busy and my mind on the accounting.

I had three balls left of this size 10 DMC thread and originally I planned to use all of them on this garland, but I’ve got two more starlit shuttles full of thread before I’m finished with the first ball and it’s already probably long enough to put on the tree as it is.  I think any longer and it might be a bit cumbersome to put on and pretty annoying to take off.  I do think that I’ll make garlands out of the other two balls (I have one other garland I’m working on from the same color), but maybe I’ll pick out a different edging pattern to use for each of those.  4 garlands of matching colors, but different patterns sounds fun.

Unfortunately, I’ve discovered that this thread bleeds a bit as I’m tatting with it.  I find it coming off on my fingers.  It doesn’t seem bad enough to toss the thread, (I have to tat quite a lot before I notice it) but I decided it would be best to limit what I used it for.  These garlands seem like a good project for it.  They take a lot of thread and will be well packed up and stored for most of the year.

I’m looking around for other pattern candidates for the next garlands.  Right now I’m feeling partial to single-shuttle patterns so I’ve been flipping through some of the Reigo books and trying to re-imagine what the the 1840s pictures would look like in real life.

Comments (2)

Camelia’s Doily #1

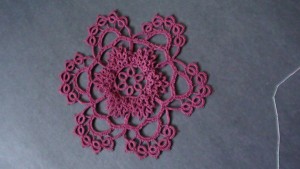
Isn’t it pretty?  This is the first of Camelia’s doilies that I’m trying to replicate. The center part is what I used for the snowflakes/Irish Roses from last week.

Out of the 12 of Camelia’s doilies that I photographed extensively in detail to try to replicate (no promises that I’ll get to them all) I picked this one partly because it’s one of the smaller ones and so I thought that would be a good one to start with.  Smaller, yes.   Not necessarily very straight forward.  Camelia does interesting work with some innovative techniques.  Even once I figure out how to replicate it I’m still left with trying to figure out how to explain it to someone else in instructions that make sense.  So don’t be expecting patterns for these anytime soon, but the project is very slowly coming along.

I think though that I’ve come up with a pretty good system for figuring out how to make them.  When I was there I took not just overall pictures like this one, but many, many close-up detailed pictures of each section of the doily as well.  When I tackle a new one I start with looking very carefully through the pictures and writing out the stitch count.  When I’ve got the whole thing written out I start tatting from that and adjusting the pattern as needed.  Usually for some of her more innovative techniques this also involves trying to write out my notes to myself about how to do it in way that someone else might have a shot at understanding.  I always use two colors so I can follow the first and second shuttle portions later.

This is actually similar to what I do for working through the old patterns from the Priscilla books, except there I am working through the old-style of writing out the directions and rewriting them in modern notation.  I WISH the Priscilla books had detailed pictures, but no such luck.

I’m actually getting close to finishing my first of this doily.  It got put aside a while back when I was packing up to move so it’s been squished up in a small tin of tatting for a while.  It’s on my list of weekly projects to finish at some point this year, so maybe you’ll get to see a finished version sometime in the next couple months.  Unfortunately, I know there’s no way that my finished version is going to turn out as nice as Camelia’s.  Maybe after a few more practice ones.

Comments (1)

Finally Finished Friday #2

This week I finished a couple of new pieces that I started two weekends ago.  We went down to the Tacoma Polo Club for the last polo match of the season.  It’s a lot of fun to watch and goes great with tatting.  Next year I want to organize a large group of lacers, knitters and crocheters to go to a match together.  Sort of like when they do the Stitch and Pitch at the Mariner’s games, except that this would be Picots and Polo.   Or maybe Picots and Ponies.

Anyway, I had just come from the Lacemakers of Puget Sound meeting where we had listened to a talk on Irish Crochet.  I used to crochet, but only with yarn.  Interestingly, I had never liked actually crocheting with thread through I think it’s gorgeous.  I even created my own class as a directed reading course in which I studied the history of Irish Crochet during the potato famine.  But never liked actually crocheting with thread so I stuck with making blankets until I discovered tatting and switch solely to that.  (Crocheting was also starting to hurt my wrists.)

At the meeting I had with me a re-creation project I’e been working on for a while.  About a year and a half ago, Sarah Nielson and I were coming back from Bobbies and we stopped in Spokane for a quick visit with Camelia Crapo.  Well, our quick visit turned in to about 4 hours and we left with stacks of photocopies and at least a gigabyte of photos some of her gorgeous one of a kind doilies and snowflakes.  We vowed to recreate them and write up the patterns.  I took the doilies and Sarah took the snowflakes.

Cut to 18 months later, we don’t have anything shareable yet, but we have started playing around with them.  I’ve been working on one of the smaller doilies.  I’ll share details about that later, but at the LPS meeting two weeks ago, I realized that the very center part of the doily sort of looked like an Irish crochet rose.  I had to try to out so I started two of them at the polo club.

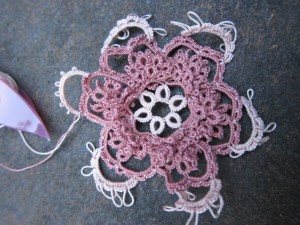
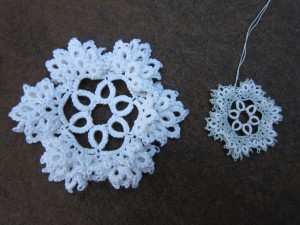
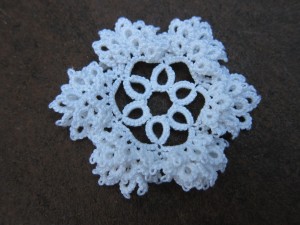
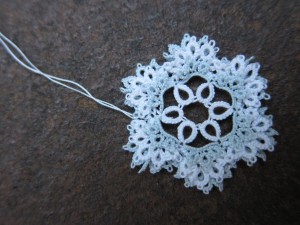
The first one is in size 10 and the second one is the left over size 80 I had on my shuttles from the bracelet I posted about a few weeks ago.  I really like the way it turned out with two colors.  The piece is done with two shuttles in three rounds, with the second round made up close, but behind the first round and the third one behind that.  The six inner rings are with shuttle 1 and all others are with shuttle 2 off of the base chain of each round.

I think it makes an interesting three dimensional snowflake or could be used like an Irish crochet rose as part of a larger piece.  And, of course, it makes a lovely center to Camelia’s doily.

Comments (4)