Archive for Christmas tatting

Merry Christmas!

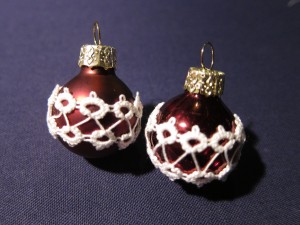
Last year I picked up these little red ornaments and I’m finally getting around to playing with them.  I should have included something in the picture to show the size, but they’re about an inch at the widest.  There’s 27 in the set, but so far I’ve only covered 3 of them.  I think I’m just going to do this same basic pattern on all of them.  They’re way too small to put on a normal sized tree, but would look nice on a little tabletop-sized tree.

I also got two other sizes, but I expect I’ll end up leaving those for next year.

Hope everyone is having a good holiday season!

Leave a Comment

Good news and not unexpected news

The good news is that I got my score back on my latest CPA exam and I passed!  2 down and 2 to go.  I’ve started studying for the next one, but am, of course, a bit behind from where I wanted to be at this point.  That fact and the fact that I have a lot of things to finish up at work before heading off on our Christmas/New Years vacation leads to the not unexpected news.  I don’t expect to have a lot of time for tatting in the next week.  Still grabbing at whatever I can get, but not making any big plans for what I want to tackle and am just going to take whatever I can get.

I DID get in some tatting at yesterday’s meeting of the Lacemakers of Puget Sound.  The group has a brand new website and I highly recommend that you check it out.  If you’re in the Seattle/Puget Sound area you should come to our meetings.  We have monthly meetings in Kent, Everrett and Bellevue.  It’s a great way to learn new things or just get a chance to hang out and enjoy the company of others who are just as fascinated by making things with thread.

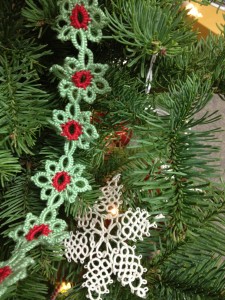
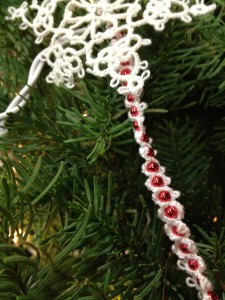
As we’re getting near the end of the year I’ve been thinking a bit about the goal I set a few months ago of finishing an unfinished project every month.  I’m proud to say that I’ve actually kept up with it!   I haven’t reported here on the last two because they”re gifts and while I don’t think the recipients are following my website, I figured it was better to stay on the safe side.  I did, however finish two other garlands that end up on “our” Christmas tree.  The “our” is in quotes because we’ll be out of town for Christmas so we decided to set a tree up at my partner’s office instead.  We went over with his brother and set it up over the weekend as a surprise for his employees to find on Monday morning so we still got the fun of setting up and decorating, but without any rearranging needed at our house.  Since last Christmas we’ve acquired a piano and a new couch and are not sure where to put a tree.

The two garlands didn’t take long to finish.  I had the tatting done for them, and really just needed to go back to hide and clip the ends.  Didn’t take long to do, but they were unfinished objects and now they’re finished so they still cover two weeks of my goal.

Included on the tree are a couple dozen snowflakes I made years ago when I worked in radio and spent a lot of time in the studio sitting around, waiting to press buttons between songs/speaking breaks.  It was the sort of job that was perfect for a crafter and I got a lot of snowflakes made.  My only wish now is that I had used better thread.  I used the Royal brand thread that was easily available to me at Michaels and JoAnns and there’s nothing wrong with it, but since those days I’ve switched over to better thread and it makes me a little sad to see all my hard work and worry that it won’t hold up over the long (40 years) run.  One day maybe I’ll have the time to replace them with better thread.  If I did this they would also be made with much better tatting since making dozens and dozens of snowflakes is one of the things I did to really practice my tatting and get better.  I look fondly of them for that aspect and love the way we literarily fling them on to the tree and let them lay there rather than hanging each one individually.


Comments (3)

A Tatted Doodle

Sometimes while reviewing my accounting videos I’ll work on a piece of tatting to keep me from getting distracted.  If I’m not doing something with my hands (either tatting or taking notes) I tend to find myself checking email or rearranging things on my desk and not fully paying attention to the videos.

Of course, it can’t be a very complicated piece of tatting since the whole point is not to get distract.  This garland has been perfect.  It’s a simple single-shuttle edging with rings of 3-3-3-3.  No need to think at all so I can keep my hands busy and my mind on the accounting.

I had three balls left of this size 10 DMC thread and originally I planned to use all of them on this garland, but I’ve got two more starlit shuttles full of thread before I’m finished with the first ball and it’s already probably long enough to put on the tree as it is.  I think any longer and it might be a bit cumbersome to put on and pretty annoying to take off.  I do think that I’ll make garlands out of the other two balls (I have one other garland I’m working on from the same color), but maybe I’ll pick out a different edging pattern to use for each of those.  4 garlands of matching colors, but different patterns sounds fun.

Unfortunately, I’ve discovered that this thread bleeds a bit as I’m tatting with it.  I find it coming off on my fingers.  It doesn’t seem bad enough to toss the thread, (I have to tat quite a lot before I notice it) but I decided it would be best to limit what I used it for.  These garlands seem like a good project for it.  They take a lot of thread and will be well packed up and stored for most of the year.

I’m looking around for other pattern candidates for the next garlands.  Right now I’m feeling partial to single-shuttle patterns so I’ve been flipping through some of the Reigo books and trying to re-imagine what the the 1840s pictures would look like in real life.

Comments (2)

Christmas in May Continues

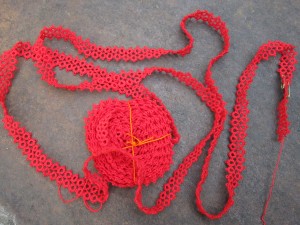
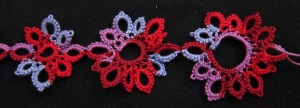
I’m making this one all in red and because I’ve been spending a lot of time watching lectures while studying for the CPA exams I’ve made quite a bit of progress on it.  It’s nice when studying involves tatting.  It’s much easier to get started for the day if I start with watching the lectures and tatting and can more quietly slip into the harder stuff (actually working the homework problems) a little later.

The original Priscilla pattern called for doing this with a single shuttle.  Make the center ring, make the rings along one side, and then come back around the other side leaving a bare thread on the back side between the flowers.  Nowdays we have split rings, so that whole thing can be done in one pass.  Here’s my modernized version:


Use two shuttles wound continuously.  

With shuttle 1:

R 2(-2)x8

Shuttle join to the last picot of the ring just made.

*R 2-4-4-2

Shuttle join to the next picot of the ring.

R 2+6-6-2, join is to the last picot of the previous ring.

Shuttle join to the next picot of the ring.

Repeat from * 2 times more.

R 2-4-4-2

With both shuttles:

Split ring of  2+6/2+6 the joins are to the open (lower) picots of the rings around this one.

**Split ring of  6-2/6-2

R 2(-2) x8, this can be done with either shuttle.

With either shuttle:

***Shuttle join to the last picot of the ring just made.

R 2-4-4-2

Shuttle join to the next picot of the ring.

R 2+6-6-2, join is to the last picot of the previous ring.

Shuttle join to the next picot of the ring.

R 2-4-4-2

Shuttle join to the next picot of the ring.

With the other shuttle, Repeat from *** on the other side of the ring.

Split ring of  2+6/2+6 the joins are to the open (lower) picots of the rings around this one.

Repeat from ** until desired length is reached.


Hopefully that’s not too confusing with the 3 different repeats.

One of the big “discoveries” of playing around with the patterns in the Priscilla book was finding these patterns that call for making a series of rings with a single shuttle that are joined BETWEEN the rings to a row of picots (either on another ring or on a chain) below them.  It’s such a neat idea for traveling with a series of rings and I like that you can’t see the bare threads at all.  I admit that I don’t explore pattern books as much as I should, but I don’t recall seeing this sort of thing anywhere else.

I also love edgings that are both symmetrical AND can be done in one pass.  I’m thinking this would make a nice belt.  I haven’t made one of those for a while.

I’ve started another version of this in green and red that uses single shuttle split rings to put the red in the center of each flower, but I don’t have pictures, so I’ll save that to share on another day.  I’m also working on diagramming this one out, but I don’t have it done yet, so that also will have to wait for another day.
Comments (2)

Christmas in May

I’ve been a bit obsessed with turning edgings into garlands for our Christmas tree lately.  I started with it back in November when I got to thinking that if I tatted up one new garland each year that in 30 years our Christmas tree would look pretty awesome.  I thought it’d be neat to have an on going project throughout the year to work on, but I’ve sort of been obsessed with finishing them lately.

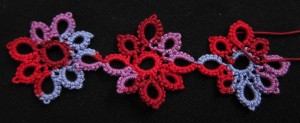
I finished the two early this month and have now started two new ones.  Both are based on this pattern from the Priscilla books.  (#1 I think).  This is not the thread I’m using for the actual garland, this is just what I happened to have already wound CTM that I wanted to finish off.  Originally this pattern was written up as a single shuttle edging done in two passes.  Thanks to the modern magic of split rings it can also be done in

just a single pass.  I also played around with the idea of expanding it out so that it would have 6 points.  I thought that if it were done in white that it would then look like a row of snowflakes.  Not sure that the third one really pulls it off, but I may play around with it some more.  It doesn’t totally lie flat yet and seems to be a bit too straight on the edges.  Maybe with a different stitch count on the outside rings to make them more pointy.  Tomorrow I’ll share the pattern and the version of this in all red that I’m working on.  It’s going to look great on the tree.

Leave a Comment