Archive for Belts

Motif in Yarn

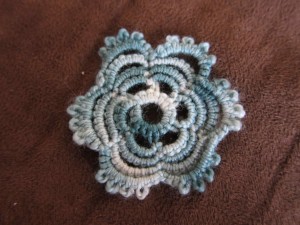
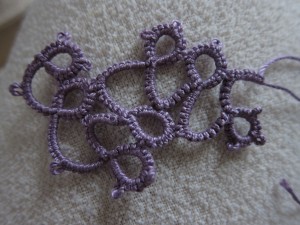
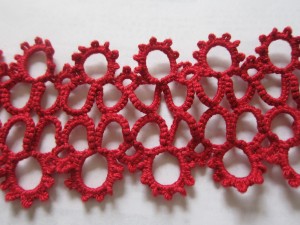
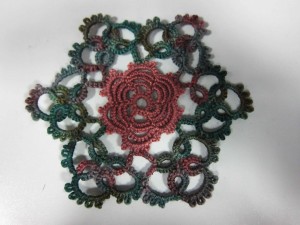
Here’s the finished motif in yarn for the belt.  I really like these colors and love the way it came out.  Overall it wasn’t too hard to tat with the yarn.  I definitely had to watch as I made my stitches to make sure I tatted a bit more loose than usual, especially on the rings, but that wasn’t much of a problem.

I’m not sure yet what the main length of the belt will be.  I may just decide that I want to do the whole thing in a ribbon that hooks on the motif and goes all the way around to tie in the back, but I’m still partial to doing some more tatting.  Just waiting until I see an edging pattern that I think goes well with this motif.  The dress is a darker and more purple shade of the coral color in center and I’m thinking that doing the rest of the belt in that center color would look good.

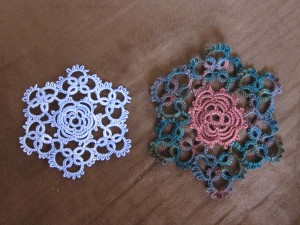
Here’s the two pieces next to each other for comparison.  The piece in thread is size 10.

I’ll be taking a small break from tatting and blogging over the next week as I’m packing up to spend the next month and a half in Seattle.  I’ll be driving and leaving early next week.  I should get up there by the end of that week and will be staying until the very beginning of February.  Looking forward to the time up there.  Should be able to make it to at least one of the lacer/tatters meetings in the area.

Comments (4)

Yarn and Chains. A Perfect Combination.

One of the things I like about this pattern is that it’s mostly chains.  I figured this would work well for tatting with yarn because it’s means you mostly work off the ball and don’t need as much on the shuttle.  Also there are no rings to close or to open if you have to retro-tat.  It went pretty smoothly and I pretty happy with the pattern so far.

This first little motif is just the center and I plan to just put a jump ring on it and call it a necklace pendant.  The next step is to tat it again in the final yarn and to add the second round.  The finished piece will be a large motif that will be the focal piece of a belt in yarn.  I got this thread specifically to match a semi-new knit dress.  The dress came with a thin little belt, but I wanted something that would stand out more and I think this will do the trick nicely.  So next up, I tat this center part again and add the next round.

I tried using one of the new wooden shuttles I bought at Shuttlebirds.  This is the first time I’ve ever felt the need for a shuttle winder.  I know they make winding faster, but I’ve never really minded winding my shuttles, but winding the yarn on the wooden shuttle seemed to pull the yarn pretty significantly.  It’s such a nice tight shuttle I couldn’t figure out a way to wind it without pulling on the yarn and so it’s wound on the shuttle under some stress.  I didn’t notice this so much with the Tatsy shuttle. Felt like this was something a shuttle winder would help with.  The sides would still be just as tight, but I think it would help some with the angle and how hard I pull the thread to wind it.

Comments (1)

Prototype Finished!

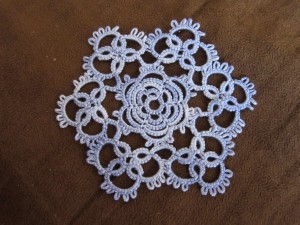
The first step to making my tatted yarn belt is to make the focal piece in thread.  It’s a motif from one of the Priscilla books that I hadn’t done before, but had seen recently on a couple blogs.  I thought it would look lovely done in yarn as the front part of the belt, but first I had to try it in thread.  My usual mode of operation when trying out a new pattern from the Priscilla books is to tatting it first in size 10 exactly as the instructions say and see how it comes out.  From there I can start to make changes or adaptations, but I like to have that first version to start with.  To make this one I use some of the thread I dyed a while back. I like the way it came out.  Especially the variations in color in the rosette part.

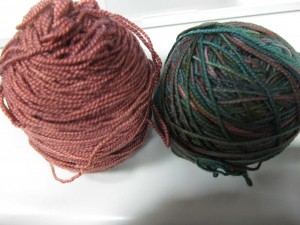
The next step to to try out the center part in yarn.  I think it will go well.  I’m going to make it in a variegated green that I already have wound on a shuttle, but to the right are the colors that the final piece will be made of.  I plan on using the coral color for the center and the green-based variegate for the outer part.

Comments (3)

The New Belt is Finished (Sort of)

I’ve actually got this belt finish, (mostly, I’ll clarify at the bottom of this post) but don’t have good pictures and have it packed at the moment.  I took the train back from San Diego to Seattle this week and haven’t gotten myself organized again yet.  I did take pictures earlier on in the project so I’m going to post those and go through the pattern.  I’ll post the finished pictures when I get unpacked, but here’s what it looked like when I had finished one strip of it.

The whole thing was just under 18 inches.  When I made my first belt I made the tatting portion of it 27 inches long so that it would be the largest part of the belt, but I ended up liking the way the ribbon looked (especially once I added a little bit of tatting to it to cover up how I attached it to the main part of the belt) and decided that for the next one I’d make the main tatting portion of it smaller.  So sadly, the difference in the the sizes of the two is an astethics thing and not that I lost 9 inches around my waist.  :(  If I want to lose 9 inches off my waist I probably shouldn’t spend my time sitting on the couch tatting.  (Actually, I do tat while hiking, but I haven’t done that lately.)

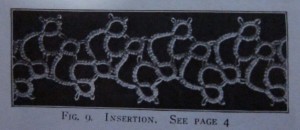
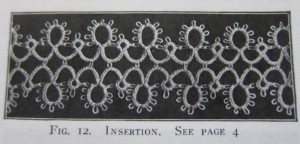
Anyway, here’s the original pattern:

Nice and simple, right?  Well, if you have the picture in front of you.  It’s actually a little trickier than written because the joins aren’t intuitive.  I love how they just say “joining as in the cut”.  Though, admittedly, it’d be a pain in the butt to explain write it all out and it probably wouldn’t make sense.  You really do need to have the picture in front of you for the first couple repeats.  Here’s “the cut”:

Instead of the 6-6 chains I did 5-5.  Just seemed to work better for me, but that’s probably a function of how I tat.  I think my chains tend to be looser than my rings so if you’re going to try the pattern, see what works for you.  Other than that I didn’t change anything, but I did add a shoelace trick after the first ring for every repeat after the first to keep the chains from twisting.  (If you’re doing it all in one color you could just use two shuttles and switch which is the ring shuttle and which is the chain shuttle with each repeat)  There’s also some annoying stuff going on with the joins if you pay attention to frontside/backside tatting.  I don’t normally, and didn’t worry about it on this as far as doing my rings vs. chains, but  in this pattern you’re joining chains to rings so you do need to pay attention to it for the joins.  I’ll explain that after the pattern.

Here’s my modernized shorthand version of the instructions.  I’ll label the rings R1 and R2 and the chains Ch1 and Ch2 so that hopefully my explanation of where to do the joins will make more sense.

(R1) 5-5-5-5  (NEVER joined to anything when first tatted.  (This was hard for me to remember.  Lots of retro-tatting because of this.))

*(Ch1) 5-5 (after the first round, this is always joined at the picot to the last picot of R2 from the previous repeat.)

(R2) 5+(always joined to the last picot of the first ring) 5-5-5

(Ch2) 8-8 (always joined at the picot to the middle (2nd) picot of R2 from the PREVIOUS repeat.)

(R1) 5-5-5-5.  (Note that this ring is NOT joined to anything.)

Shoelace trick to switch the threads before the next chain.

Repeat from * joining as described.

Does all that make sense?  Let me know if this is clear.  (Part of the whole point of doing this blog is for practice in writing up patterns, so please, always feel free to let me know what’s helpful and what’s confusing).  Would it make more sense if the the “guidelines” for joining were written after the pattern when you’re working on the second repeat?

Finally, a note about the joins.  If you’re using two colors you have to pay attention to your joins because you’re doing joins of chains to rings.  When you do a join with threads of different colors you get a little blip of color with your joins.  Usually I don’t worry about that and just call the side where that happens the “back” side.  Problem is that with this pattern you do a shoelace trick to reverse the work with each repeat.  This means that the blips of color are not all on the same side of the tatting anymore.  They switch sides with each repeat.  Arg.

If you want to avoid the color you’ve got to switch your type of join with each repeat.  I usually do an up join, but for every other repeat I needed to do a down join for the chains to rings joins.  Pain. In. The. Butt. Very hard to remember and I did it wrong a few times so I’ve still got the blips of color on both sides.  I might not have worried much except that since I was using size 3 thread on this the colors are petty noticeable.  (To me anyway).  At Camp Wannatat, Sandy showed me the Larks Head join which is more work, but gets rid of the blip.  This would have been a good project to practice this on, but unfortunately, I totally forgot about it until after I finished the tatting.  Another time, perhaps.

When I started messing around with this pattern I picked it because I wanted a relatively thick edging that could be done in one pass.  I wasn’t sure if I would like the final version because I didn’t know if it worked in just one color.  Seemed too chaotic.  I think it’s much better in two colors and I like it this way, but decided I’d do the doubled over version anyway to make a really wide belt.  I’m just a sucker for symmetry, and even though the final version doesn’t have left-right symmetry, it does have top-bottom symmetry and that makes me feel better…

So I tatted up a second row and added it to the first as I went.  The whole frontside/backside tatting with regards to the joins was an even bigger pain in the butt to keep track of for the second row, so there’s a bunch of mistakes there too. I decided at the last minute to wear it to a wedding. (Picture on the right.  Don’t you love the matching necklace!  That’s the center part of the motif from the star doily in Priscilla Book #3 in the same size 3 blue thread as the rings on the belt.  The color is a little funky in the picture, but the dress is actually a dark blue, not black.)  I ended up sewing on the ribbons at my friend’s hotel room when I went to pick her up to head over to the church.  This means that I haven’t yet gotten around to tatting up something to cover the sewing.  I do have an idea for that though, so maybe sometime this week.  When I’m done with the “finishing” work I’ll take more pictures of the whole thing.
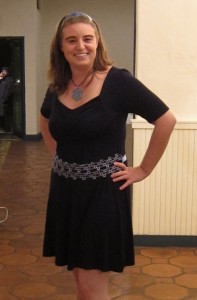
I’ve really enjoyed making belts.  They work up pretty quickly in size 3 thread and it’ll be fun to have a bunch of them to easily add some lace to dresses.  Plus, they’ll be a great way to try out a lot of the edgings in the Priscilla books.  Since I think I’m going to make more I’ve even gone and given them their own category to the right.  This way all the belts will be easily browse-able.
Comments (2)

Picking a Pattern for a New Belt Project

Michael’s had ribbon on sale last week and I couldn’t resist picking up a few new colors to try out with some new tatted belts.  There’s a particular pattern in Priscilla Book #2 that’s been bothering me lately.  I can’t decide if I like it or not, but I think it might make a nice belt.  And if it turns out I still don’t like it?  Well, at least I’ll be tatting it in size 3 thread so it should go quickly.

For the last belt I made I used a ring and chain pattern that had to be doubled over to give it vertical symmetry and make it the right width for the belt. This meant tatting one side of the belt and then flipping it over and tatting the other side. It’s been my normal way of turning edgings into bracelets or necklaces or anything I want to be thicker, but I’ve been wanting to find a pattern I like that can be done in one pass and still result in a fairly wide piece of fabric.  Haven’t found one I really like yet.

This pattern has been catching my eye because it’s done in one pass and it looks like it ends up being fairly wide.  I’m just not sure I like it.  It’s hard to follow and feels a bit chaotic.  I tatted up a small piece of it just to get a feel for the pattern and still wasn’t totally sure about it.  (Wish I could have tatted a longer piece, but I ran out of shuttle thread.  Size 3 goes pretty quickly.)  I think tatting it in two different colors will help to give it a little more definition.  The rings in the pattern come in pairs and the chains should form something of a wave of color bending around the pairs of rings.  I’m going to try it out in two colors, and I’ll write up the pattern for it when I do.

Though my main attraction to this pattern is that it’s done with only one pass, it’s not totally symmetric and I’m starting to wonder what it would look like doubled over.  Though a single pass should be wide enough for a belt doubled over might looking interesting as a super-wide belt (or normal sized with size 10 thread).  I may end up trying that as well.  I will say that I really like using the size 3 thread for belts because I think then they’re actually big enough that you can see the design from farther away.  Belts are not really meant to be looked at up close.  At least, I’d rather not have people bend down and take a look at my waist from 6 inches away, but hey, maybe that’s YOUR thing…

Comments (2)

Sash Belt is Finished!

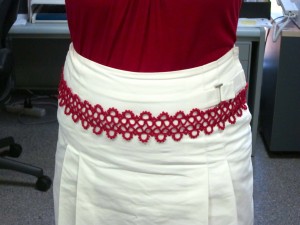
It’s so nice to finish large project and it’s amazing how having a deadline will actually force you to do it.  I wanted to wear my new belt for Valentine’s day so I finally sat down over the weekend and finished it off.  Doesn’t it look lovely in my co-worker’s office?  (Had to take it there because she actually has a window and real sunlight.)  Finishing off the belt didn’t actually take too long because I’ve had the main part of the belt tatted for over a month now.  The next step was to attach the ribbons that would tie in the back and add tatting to them to make them look  little fancier.

Adding this little bit of tatting to the bows also gave me a chance to check off 4(!) more patterns in the Priscilla books.  Technically, it’s two, but their both very simple patterns repeated in both the 1st and the 3rd book.  Maybe that’s sort of cheating, but hey, my project, my math.

I don’t have the books in front of me so I’m not going to do the normal pictures of the figures in the books and the pattern as written.  Maybe I’ll write it up in a future post, but I don’t think that’s really necessary.  They’re pretty standard.  Here’s the basic process I used to make them.

NOTE:  I consider this whole piece just a proof-of-concept piece to get a rough idea of what would be involved in making some belts like this so I just used fabric glue on the ribbon.  Normally I’d sew the tatting to it, but I was just looking for quick and dirty.  I got both.  🙂

I think this was the second pattern in both the first and the third Priscilla books.  The rings are all 3+3-3-3 with the first picot joining to alternating rows (so the 3rd ring joins to the 1st, the 4th ring joins to the 2nd, the 5th ring joins to the 3rd and so on).  The only change I made was to leave out the first picot on the first ring of each row and the last picot on the last ring of each row.  Then I folded the piece of tatting over the end of the ribbon and glued it down.

I wanted something that would cover both sides of the ribbon because it will flip around while your wearing it and this seems to work, though I don’t actually care much for the pattern.  I’m just not generally a fan of uncovered threads and it was especially hard to get them to lay flat in this situation.  But as I’ll say many times in this post, this was just a proof-of-concept version of the piece and in the future I’ll pick a more interesting pattern to use to cover the ribbons.

Attaching the ribbon to the tatting was also pretty easy thanks again to fabric glue and a really simple tatting pattern. Like the ends above I first folded over the ends and glued them down to get rid of the rough edges.  Then I passed the ribbon through the loop on the end of the tatting and glued it down onto itself.  Added a another piece of very simple tatting just to cover the edge.  This pattern is the very first pattern in both the 1909 and 1925 books. Rings of 3+3-3-3 with about 3/4-1 inch of thread between them.  Hate the way the uncovered thread looks (and the glue), but once again, this was just the proof-of-concept so it works for this.  Attached both ribbons the same way.

The original piece of tatting that makes up the main part of the belt is about 27 inches because I didn’t want the ends where it attaches to the ribbon to show from the front.  Now that I’ve got a finished version though I’m re-thinking this.  I actually think it work out pretty well and the ribbon attachments could be on the side or even a little bit on the front.  A fancy motif over the end of the ribbon would be a nice accent to the sides of the best.  AND that would have the added advantage of meaning less tatting would be needed for the main part of the belt.  Instead of 27 inches next time I’m going to try something more like 18 inches.

I forgot to take a close-up of the necklace I’m wearing in the first picture, but it’s actually the center part of the motif from the star doily I’m working on.  I made it out of the same size 3 thread that the belt is made of so it’s pretty big and loved the way it came out.  It’s nice to have such a bold piece of tatting.  I wore it again on Tuesday with a red dress and got lots of comments on it.   I think I may have to start doing a lot more tatting in size 3.  Originally, I picked size 3 for the belt just because I wanted it to work up really fast.  As a proof-of-concept piece I didn’t want to spend a lot of time on this first “draft” and figured that when/if I made more I’d make them out of a smaller thread and more complicated pattern.  I actually think now that size 3 totally works for the belt.  I do plan on trying out some other patterns for belts but I think I’ll stick with the size 3.

Amazing!  Once I learned how to tat nearly 10 years ago I used size 80 almost exclusively for many years.  I switched to size 30 when I discovered and fell in love with Altin Basak thread and now I use mostly size 10 and 20 and am thinking of moving up to size 3 for a lot of stuff!

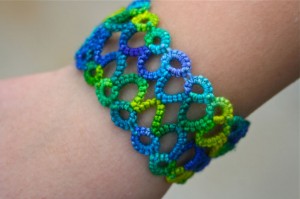
Actually, I may even try working with Koigu’s merino yarn for some. Wildfiber, the yarn store in Santa Monica where I love to hang out and tat doesn’t carry any thread other than a small amount of embroidery thread.  But they do have a really comfortable area for hanging out and knitting/crocheting/tatting so I wanted to find something I could buy from them.  That way I wouldn’t feel too guilty about just coming in to hang out and use the couch space for tatting.  :)  I bought a remnant of the Koigu yarn to try tatting. I made a bracelet out of it a while back and really liked the way it came out.

It has to be either a relatively simple pattern or one that I know really well because it’s a pain in the butt to retro-tat with, but other than that it’s surprisingly easy to work with.  It’s kinda expensive though (at least compared to tatting thread which is hours and hours of tatting time for under $5), so I’ll be test tatting a couple other belts before I make that plunge.  I think it should work out to approximately the same size as size 3.

So stay tuned for that!  I think with the right pattern, some beads and the Koigu yarn I’ll end up with some really elegant belts.

P.S.  I promise in the future to come up with better names for big projects like this.  “Sash Belt” is still bugging me, I think because it sounds like “Slash Belt”.

Comments (3)

Tatting Large Rings with Large Thread

Yesterday was a really busy day with work and getting ready for class tonight so I haven’t done much tatting in the last 24 hours, but I wanted to write about something I forgot to include yesterday in my post about the tatted belt. It’s probably not much of a new idea, but I figured it out while during that project and wanted to share it here.

The larger rings were made of 9 picots separated by 3 stitches for a total of 30 stitches in each ring.  Since I was using size 3 thread it meant that each ring took a fairly long length of thread.  I’m not sure how long exactly, but it got really annoying to constantly have to pull more thread through the stitches of the ring.  And as there were more and more stitches on the ring it took more and more pulling.  I could feel wrists tightening up everytime I had to do it and because it was hard to pull the thread through I had to keep stopping to do it.  (I couldn’t just do it with the fingers of my left hand like I can with a smoother thread and smaller ring.)

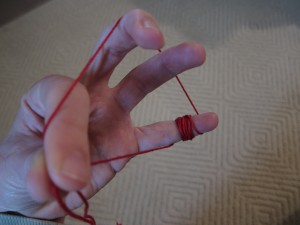
About half way through the project I realized I could wrap the shuttle thread around my pinky like I was making a chain, and then bring it around like a normal ring.  That way as I needed more thread to create the ring I already had it “inside” the ring and just had to unwrap it from my finger.  For the rings in this pattern I found I needed to wrap it around my finger about 10 times to finish the ring without having to pull anymore thread through.

Anyway, that’s all for today.  I just thought it was a handy little trick and hopefully it helps you as well if you ever decide to do a pattern with large rings with size 3 thread.

Comments (3)

Sash Belt (for lack of a better name)

This was one of the rare occasions where I picked a pattern based on a project and not the other way around.  I saw this listing on Etsy of a belt with a large bow in the back and wanted to do something similar in tatting.  (Here’s another cool example from the same designer.)  I wanted a piece of tatting in the front that would tie in the back with a large bow.

Because a belt is a fairly large piece of tatting I decided to do my proof-of-concept piece in size 3 thread.  That way it would work up faster and if it was a disaster I hadn’t spent too much time on it.  Size 3 thread meant finding a more simple pattern so I flipped through the Pricilla books and found this one on page 5 of the 2nd book.

I figured that in size 3 thread this would work up large enough to make for a bold belt and I picked a nice bright red to give a bit of color to a white skirt I wanted to wear it with. My idea was to tat this pattern for the about 3/4th of the size of my waist and then add red sashes to the ends that would tie in the back.

Here are the instructions as written in the book.  In modern short hand they are:

*Ch 7-7

R 3-3-3-3

Ch 7-7

R 3(-3)x9*

Repeat between *s.  Make a second row that attaches the picots of the chains.

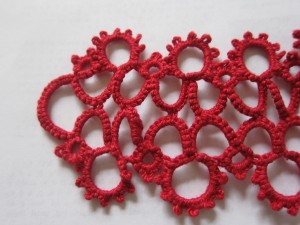
I don’t know who would actually want to start this pattern with a chain, so I started with the small ring and went on from there.  If I were redoing the pattern now I would make the chains shorter.  As you can see in the picture the chains sort of bunched up like there is too much curve in them for the short distance between the rings.  (I wonder if it would help if I didn’t tat the chains as tightly.)

One of the things I learned in Sharon’s tatting design course was that if you have a chain and rings pattern and you want it to stay flat you need to have the number of stitches in the chain equal the number of stitches in the sections of the rings that make up the top part of the negative space created by the rings and chain.  That’s a really complicated way to say it, but maybe if I explain it through this particular pattern.  The first ring has 3 stitches after the picot that will become the join.  The second ring has 3 stitches before the join.  Together that’s 6 stitches.  So if I wanted to do just one row of this pattern and wanted it to be straight I should have chains that connect the rings of only 6 stitches not 14 like this pattern calls for.

I wish I’d stopped and taken a picture before I’d finished adding the second row.  Without the second row the pattern has a tendency to curve in on the ring side.  (Which actually could be a pretty cool effect.  I could see joining picots of the large rings to make the pattern circle around… I’m going to have to try that.)

Anyway, the second row pulls it back and straightens it, but you can still see how it’s bunching in the front.  If I were to do this pattern again I’d probably try 5-5 for the chains to see if that would help.  Without the second row it would still bend but I think that with the second row it would work.  I could try 3-3 which according to the calculations above should keep it flat, but it would also take away some of the height of the pattern and I would want to keep that for the belt. When working the leaf motif yesterday I learned that joining two rings with two joins instead of 1 gives the piece more structure and makes it stiffer.  I wonder if that might work here too with chains of something like 5-4-5 and then 5+4+5.  Just something else to try sometime.

One of the things the book doesn’t mention is how to add on the second row.  I guess they just expect you to tie off the end of the first row and then start the second separately.  I didn’t want to do that because 1) Didn’t want to have to hide more ends than needed and 2) Wanted to create a loop to attach the sash part to later.  Pictured is my solution.  After the last ring of the row I did a chain of 20 unflipped double-stitches before starting up again with the first ring of the 2nd row.

I didn’t flip the stitches of this chain because I wanted it to curve into the rest of the tatting.  This created the loop that I’ll eventually use to attach the sashes.

As a side note here I didn’t start the first row at the end.  That doesn’t really make sense… When I was tatting the second row and was getting back to where I started I kept going and did an extra repeat so the last repeat of the second row made it longer than the first row.  Then I did the unflipped stitches of the end and did what would become the first repeat of the first row.  That way I was making the final knot and hiding the ends about an inch into the piece and not at the end.  I think that might make it a little stronger since it’s the end that’s going to have the most tugging on it when the best is tied.

This is as far as I’ve gotten on this project.  All the tatting is done, but I haven’t figured out how to do the sash part yet.  I’m hoping to find something at Joanns that I won’t have to adapt much because I’m not too fond of sewing.  If you have any ideas, please let me know.  I’ll share the finished piece here when I’m done.

Comments (2)