Circular Motif for Yokes
 Been focused mainly on making progress on a new custom piece. It’s for a belly dancer and one of my bracelet designs, but made bigger to fit around her upperarm. I can’t wait to see what it looks like with the rest of her belly dancing costume.
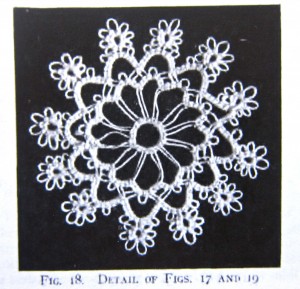
I did take a break from that project today and finished up this awesome little circular motif from pages 5 and 6 of the first Priscilla book. I used some of the blue thread left on my shuttles from the star doily and surprisingly, managed to have almost exactly the right amount left on the shuttle for it. Love when that happens.
I also love the idea of a single join to two separate picots at the same time. It’s something I’d been contemplating, but never actually tried and I think this is the first place I’ve seen it done. I use the point on my shuttle rather than a crochet hook for my joins, but using a crochet hook would probably make this double join a lot easier. It’s not a pattern that I’ll be able to do easily while walking (yes, I tat while walking and hiking) but I really liked the way this motif came out.
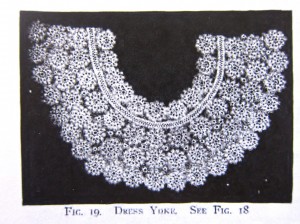
The book gives two yoke designs to use this motif for. I haven’t decided if I’m going to do projects that big out of it. Or rather, I doubt I’ll make a yoke, but may find some other large project for it. I’m trying not to start any more large projects right now. I’ve got enough going already so I want to finish a couple others soon. For large Priscilla related projects I just want to focus on finishing the star doily and a baby bonnet from another Priscilla pattern that I’ve been eying and will probably start soon.
ANYWAY. Let’s get on to awesome double-joining pattern for this motif, shall we?
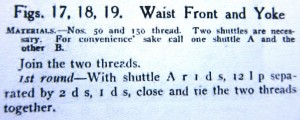
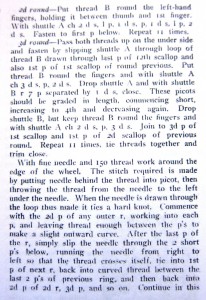 Don’t be intimidated by the length of these directions in the book. Most of them are for the finishing technique and for putting together two different yokes out of this motif.
I didn’t actually try the finishing technique, but I didn’t find it necessary. The reason given for doing it is to make the motif come out 
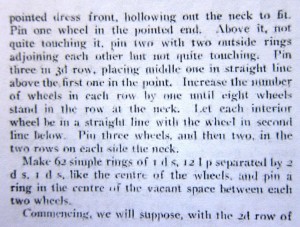
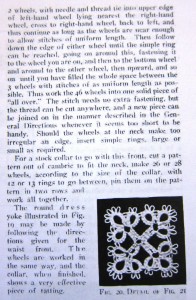 flat and even without blocking. My motif didn’t seem to need anything, but I did make it out of size 10 thread, so that might have made the difference. The book called for size 50.
Here’s the instructions for the motif. I’m including the pictures of the instructions for the finishing of the motif, but I didn’t do them on mine. The only difference between the instructions as written and what I did was to climb out of the first ring with a mock picot rather than to cut and tie as they usually have you do.
Wind two shuttles using the CTM.
Round 1
With shuttle 1, R 2(-2)x11Â Picots should be very long.
Round 2
Leave a mock picot,
*Ch 2-1-1-2 leaving the first half of the first stitch unflipped to lock the threads in place.
Shuttle join to next picot on ring.
Repeat from *, working your way around all picots of the center ring. Last join of this round will be into the mock picot.
Join at the same time to both the first picot of the first chain and the last picot of the last chain.
** Ch 3-2
With Shuttle 2 (the same shuttle as made the stitches of the chains) R 1(-1)x7Â Picots should increase in size until the 4th picot and then decrease in size.
Ch 2-3. Shuttle join (Shuttle 1) to TWO picots of the previous round. Both the picot before and the picot after the previous round’s joins to the center ring.
Repeat from **, working your way round the motif. Final chain should be joined to the last picot of the second round.
Hide ends and cut.
Here’s how mine came out:
So that makes the basic motif. The instruction continue and want you to use size 150 (I think that’s the size of sewing thread) to weave around the motif. This is suppose to give it shape, I guess. I didn’t do that and not sure that it needed it, but maybe I’ll try it in the future.  The instructions continue and give you directions to make the two yokes below.
I don’t have any need for yokes. I’m sure I’ll make more of these motifs and I like the way they look sewn together, but don’t know yet what I’ll actually make from them. However, I’d like to make something that’s actually useful. Ideas?


Fox Said,
January 24, 2011 @ 5:13 pm
I cannot believe your site today as I am in the midst of tatting a small motif from the old DMC book that looks remarkably like the one you have jut shown! I actually did a double take.
I will be posting it soon, as it is only about half done. When it;s done, I’ll give you a shout to have a boo. Funny, that synchronicity!
Fox : )
Gina Said,
January 24, 2011 @ 6:53 pm
I’ve seen some patterns that join into 2 picots at the same time but rarely – and I think I’ve made this one before too, like Fox. I know the material has been reprinted, though not necessarily every bit of it, but couldn’t tell you in exactly which publication. I think House of White Birches has some. I love that you tatted it in blue. Very soft and delicate looking.
admin Said,
January 25, 2011 @ 7:48 am
Thanks for your comments. I’d never seen this pattern before, but it doesn’t surprise me. I do see a lot of stuff reprinted in multiple places. I’ll have to keep an eye out for it.
Can’t wait to see your version of it, Fox.
Gina, I love that blue. It’s just the Royle brand from Michaels. Inexpensive and great for trying out all these patterns.
Fox Said,
January 25, 2011 @ 3:45 pm
Hi again,
I just finished my motif and I must say that the similarity between them lies in the small 5-picot rings and ones with long picots in the centre, thus producing the visual confusion for me. Mine has not got the two picots together, though I have done this kind of join in other patterns that do not look like this one. I ‘ll post mine tomorrow. Not enough daylight to photograph now.
Fox : )
admin Said,
January 25, 2011 @ 5:56 pm
Hi Fox. Ahh. Yeah, I like that ring with it’s picots. It’s a neat visual effect. The joins are fiddly but worth it.
Judy Said,
January 26, 2011 @ 12:13 am
The joins don’t bother me, but how did you decide how long to make the long picots? Do you have a trick eyeball?
Since your thead is larger than the recommended, you couldn’t use a direct measurement. Did you compare stitch size to length of picot? Something else?
admin Said,
January 26, 2011 @ 7:48 am
Hi Judy, I basically eyeballed it comparing the size of the center ring to the size of the picots. I think though that if I were to do it again I’d make them slightly longer than I did this time. Unfortunately, by the time I do it again I will have probably forgotten how long I made them this time. I think I made them about a half an inch long or so. It’s hard to judge. If they’re too short or two long the piece won’t lay flat. My was a bit tight when I finished, but I stuck it in a textbook for a while and it seemed to lay flat then.
Sue Said,
January 26, 2011 @ 9:40 am
That motif is awesome! 🙂
Wanda Said,
January 26, 2011 @ 10:09 am
Your motif looks great! How large did it measure when made in size 10?
I made this same motif last fall. I used size 30 thread instead of the size 50 and I didn’t go around it with the 150 thread, either. I did like you in that I climbed out with a false picot. After a few false starts I made myself a picot gauge so I could get them even for all of them. I put a few together for a doily, which changed the look because of how I joined them. If you’d like to take a look it’s on my October 12, 2010 blog entry.
I’m looking forward to seeing you baby bonnet – or veil, whichever it turns out to be. Love it that you are doing some of the vintage patterns.
Wanda
admin Said,
January 26, 2011 @ 10:18 am
Thanks Sue!
Wanda, the motif is 2.5 inches from picot tip to picot tip. If I were to do it again I’d make the center picots slightly longer so it might work out to be 2.75 total. I’ll go check out your blog now. I’m interested to see how they look when joined together. Thanks!
And thanks for your comments about the baby bonnet. I’m interested to see how it turns out too. 🙂
admin Said,
January 26, 2011 @ 10:29 am
Wanda, just looked back at your old posts and found the one about this motif. I didn’t even recognize it! I literally went flipping through my Priscilla book trying to find the motif you were describing thinking that this was another post about another old motif you did. Gorgeous work and I love the matching edging you created to go around it.
Here’s the direct link if anyone else wants to check it out:
http://wandasknottythoughts.blogspot.com/2010/10/doily-with-antique-motif.html