Starting the Star Doily
 Today I started with the larger motif that builds into the star doily on page 13 of book 3. I’m a little partial to patterns with lots of chains because they mean you’re less likely to need to add more thread. 🙂 I’d been wanting to try a motif in which some of the rounds were simply chains that joined with the shuttle thread to the previous round. This was a fun little motif and with a split chain/split ring climb out from the inter part to the outer part it meant there was also no tying and cutting until the very end.
I did make a slight change to the very beginning. Instead of joining all the center rings to one large picot from the first ring I made each ring with two small (joining) picots and joined each ring to the previous one. I don’t like making large picots with multiple joins to them because I never seem to get the size ring. They’re either too small and bunch up or two big and loose. Two picots means the center comes out looking a little neater and is a bit stronger to boot.  So where originally the center rings were 7-7 I made them 6-1-6 and they seemed to turn out fine.
Here’s the instructions as I tatted them:
 Use CTM, leaving shuttle attached to ball
Round 1
R 6-1-6
CH 10
*R 6+1-6
Repeat between *’s joining the 6th ring to the first and joining the last chain with a shuttle join to the top of the first ring.
Round 2
Ch 5-6-5, shuttle join to top of next ring, repeat chain around motif joining with a shuttle join at the top of each the next 4 rings.
Last chain is: CH 5-6 split chain of 5 (sorry I don’t know the shorthand for split chains).
Round 3
SR 7/7
CH 10
**R 7+7 (join to next picot on previous ring.)
CH 10**
Repeat between **’s, joining each ring to the next picot of previous round, all the way around. Join last chain with a shuttle join to the top of the first split ring.
Round 4
CH 4-2(x4)-4 ((5 picots separated by 2 stitches)), shuttle join ot the top of next ring, repeat chain around motif joining with a shuttle join at the top of each ring of the previous round. Continue around motif then tie and cut ends.
 You end up with a nice little round motif. I made this one with size 10 thread. I was a little disappointed that it turned out just a little bit too small to use by itself as a coaster. Made from size 3 I think it would be prefect. AND since it’s much heavier on the chains than rings I think it would tat up easily with size 3 and you probably wouldn’t have to worry about running out of thread on your shuttle. I am adding it to my list of things to try later. This list is getting rather long…
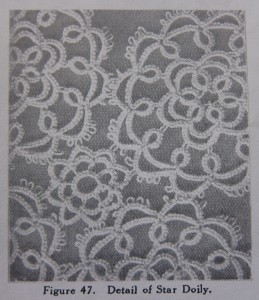
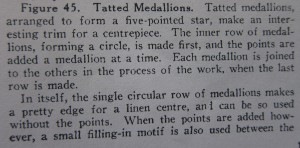
I’m also going to tat up the finished star doily that is described in the book. There’s a little motif that I’ll also have to learn to connect the larger motifs, but that’s a project for another day. From just looking at the picture of the finished doily I wasn’t sure how you were supposed to find a cloth that size or cut it to fit, but once I read the directions I saw it’s actually easier than I expected. You tat and attach all the medallions to each other, sew them onto a large piece of cloth and then cut the cloth away. Never knew it would be so easy.
Mom already said she liked the color of this first one so I think I’ll stick with the light blue. One motif down, 29 to go, (plus the 5 little ones.) More on this project later, but here’s the doily as it’s shown in the book:


Sue Said,
January 18, 2011 @ 6:23 am
The motif is beautiful and the color is too! 🙂
admin Said,
January 18, 2011 @ 10:58 am
Thanks Sue!
Snapdragon Lace » Progress on the Star Doily Said,
January 21, 2011 @ 3:49 pm
[…] I’ve made a bit of progress on the star doily in the last couple days. Here’s the post about the original motif. […]
Snapdragon Lace » From size 3 to size 120 Said,
May 27, 2011 @ 9:36 am
[…] just to try out using thread this small and see how the variegate would work out. The pattern is the same motif from the star doily (at some point I’m going to actually finish that). I finished the motif and had it sitting […]
Snapdragon Lace » Finally Finished Friday #1 Said,
August 31, 2012 @ 7:32 pm
[…] spots of bleach on it. Â So I made these flowers to cover them up. Â I used the motifs from the Star Doily in Priscilla Tatting #3 which has become my go-to pattern for a round motif. Â The smaller ones are simply the center part […]