Archive for Priscilla Project

The Holly and the Ivy

Here’s the second Christmas garland that I finished this last week.  In these colors it reminds me of holly and ivy.  This one uses a pattern from Priscilla Tatting Book number 2.  I’ve just realized that though I started using this pattern a while back, I never actually posted the pattern or my variation.

It’s always nice when I have very few changes to make on the original pattern.  That’s been the case a lot lately and I think this is because I’m still working on the tea cloth which has lots of changes so I’ve been picking easier patterns to work on as side projects while I struggle through that.  I’ve had my eye on a couple of more complicated projects and I’m trying hard not to start them until I’ve finished up some more of my other works-in-progress.

And here’s one of those former WIPs!  I started this soon after Christmas and decided to just keep going with it until I ran out of the red thread.  Ended up getting just under 7 feet of it.

Here’s the instructions.  My main change was to make the rings of the flower 7-1-7 instead of 8–8.  I don’t like to join all my rings to one center picot because then I have to guess at the right length to make it and because I think it’s stronger if you do a serious of picot joins instead of one large one.  Seems to also make it a lie a bit flatter and more even as well.  Except for that and a pair of Shoe Lace Tricks the pattern pretty much stayed intact.

*R  7-1-7

**Ch 3-3-3-3

R 7+1-7 (join to picot on previous ring)

Repeat from ** 4 more times for a total of 6 rings, joining the second picot of the last ring to the open picot of the first ring.

SLT

Ch 3(-3)x5

R 3+3-3-3 (join to the middle picot of the last chain of the flower.)

Ch 3(-3)x5

SLT

Repeat from * joining the second picot of the first chain in the flower (first 3-3-3-3 chain) to the ring between flowers.  Continue until desired length is reached.

That’s it!  Hope you like it!  Now that I finished off both the Christmas garlands that I started around Christmas last year I’ve been flipping through the Priscilla books to pick out the next on to do.  I think I’ve got a good one picked out, but since it involves changing a single shuttle pattern into one with split rings and maybe even three shuttles with split rings and single-shuttle split rings I want to make sure it works before I post in detail about it.

Leave a Comment

And 4 Weeks Later…

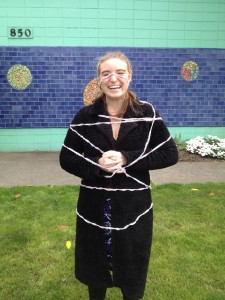
Busy month!  Lots to get caught up on from Shuttlebirds, Camp Wanna Tat and other projects, but I’m going to start with the Christmas garland from my last post.  Finished it!  I had been hoping to get it done before the end of Shuttlebirds but didn’t finish it until the day before the LPS meeting last week.  This was taken outside our meeting space after I showed it off to the group.  Nice to finally finish it.  It’s a cute pattern when finished, but it’s basically just all chains and when you’re making 30 feet of it (technically 60 feet, because you do one side and then the other) it gets a bit boring.  I probably should have just put it aside for a while and come back to it in a few months, but I’m trying to go through my started projects and actually get a bunch of them finished so it feels good to have this one done.

I had actually been working on two garlands and when I finished this one I got back to working on the other.  I was only making that one as long as it could be until I ran out of the red thread for it.  Did that this last week so I’ll share that next. Strange to finish both Christmas garlands so early in the year.  Guess it’s time to start on another!

Leave a Comment

Whoops… Quick correction.

Quick correction in the pattern yesterday.  I forgot to add a line about a picot that is a regular picot in the first repeat and becomes a join in each repeat of the pattern after that.  I added it in red to yesterday’s pattern, so hopefully it doesn’t confuse anyone.

Wasn’t feeling well today, so the first half of the day was a waste.  Second half went much better.  I have an order for another pair of fingerless gloves so I’ll be starting work on those as soon as I clarify the details with the buyer.  I visited Pacific Fabrics and picked up some nice elastic for the project that I’m working on the Priscilla edging for.  Since I  think it’s going to actually work out, I’ll finally announce here that I’m trying to make a headband out of it.  I haven’t decided yet if it’s going to be just a single row of the edging or if I’ll double it over and do a second row.  We’ll see how long it takes me to finish off the first one.  I think it will look nice with either.

Leave a Comment

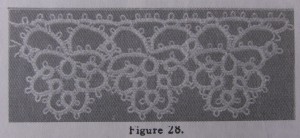
Priscilla Edging Pattern

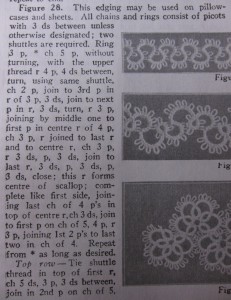
Here is the pattern to the edging from yesterday as written in the Priscilla books and as translated into modern notation by me.  I stuck to the pattern pretty straightly with the exception of adding two shoe-lace techniques to make it so that I could use a ball and shuttle instead of two shuttles.

R 3(-3)x3

*CH 3(-3)x5, SLT

R 4(-4)x4  (This is called the “large ring” from here on out)

CH 4-4-4+4+4, joins are to the 2nd and 3rd picot of the first ring.

R 3-3+3-3, join to the first picot of the large (second) ring.

CH 3(-3)x3 (Starting with the first repeat, the first picot of this chain will be a join to the previous repeat.)

R 3+3+3-3, the first join is to last picot of previous ring and the second is to the next picot of the large ring.

CH 3(-3)x3

R 3-3+3-3-3, join to the open picot of the previous ring.

CH 3(-3)x3

R 3+3+3-3, the first join is to the second to last picot of the previous ring, the second picot is to the next picot on the large ring.

CH 3(-3)x3

R 3+3+3-3, the first join is to the open picot of the previous ring, the second picot is to the next picot on the large ring.

CH 3(-3)x4 SLT

Join to the start of the large ring

CH 3+3(-3)x4, join is to the last picot of the first chain.

R 3+3+3-3, joins are to the first and second picot of the chain before the SLT.  When doing the next repeat, there will be another join to the second join in this ring.

Repeat from the * until desired length of edging is reached.

A relatively easy pattern and it’s nice that there weren’t many changes to be made.   I’m finding that the tricky part is in not making any mistakes because every ring is different in the pattern and there’s a lot of easy mistakes to be made.  (Too many picots in a ring, using 3 ds like everywhere else in the pattern in the one ring that’s supposed to have 4 ds between picots… that sort of thing).  Nothing too complicated, but each part different enough that you have to pay attention to it.

I’m still working on my original project idea using this pattern, but since I’m still not far enough along that I know it will work I’ll continue to stay mum about it.  I do think that a single repeat of this pattern will make a nice necklace pendent, so it’s possible I’ll work on that tomorrow, however I did get an order for a pair of fingerless gloves today, so if I can get the details of that sorted out tomorrow I’ll probably start on those instead of working more on the Priscilla projects.

Leave a Comment

New Priscilla Edging

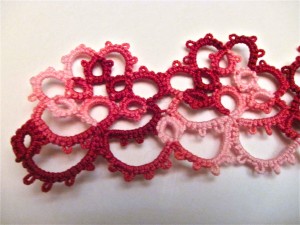
Yesterday I got started on a new edging from Priscilla Book #3. I don’t usually use variegates and I almost never use them on a new project when I’m working out the pattern, but for the project I have in mind it felt like it would work.  I’m not going to say what the project is just yet, though, just so that I can make sure that it’s going to work out first.  Also, I came across a bag of Flora threads and wanted to work with them.

I was pleasantly surprised not to have to make any changes in the pattern as given in the book.  Well, one small change, just a SLT to let me use a shuttle and ball instead of two shuttles.  It’s late now, but I’ll write out the pattern tomorrow.  I think that just a single repeat will work as a nice necklace pendent.  When I’m done experimenting with this current project then I’ll try that out and also see what it will look like with two solid (or maybe one solid) color.  It’s a fun pattern and I like it.

Comments (4)

Tatting with Yarn Continued.

I suppose it was silly of me to expect to finish the scarf by the time we made it up to Seattle.  I did get both of the white rows finished and (just barely) started the first of the purple rows.  Figuring out how much yarn to expect to use was a bit of a pain in the butt.  As was working with overwound Tatsy shuttles (I didn’t want to have to do much adding of thread and hiding of ends so I started with it over wound).  I’m going to follow the pattern as shown in the Priscilla book, even though it has a asymmetrical aspect that bothers me.  This asymmetrical bit should make it possible to finish the pattern with the yarn I bought without needing to find more.  It would be annoying to have to buy more since I bought it on clearance in Los Angeles and don’t want to spend more on this experiment.  I was surprised by the “fraying” of the picots, but I suppose that’s what happens when I choose to tat with a yarn without a strong twist.  It’s an interesting effect and should work out though.  It will serve as a nice contrast to the general tightness of the tatting.  (btw, the yarn is Debbie Bliss – Eco Fair Trade Collection.)

I want to give a big thank you out to those who test tatted my choker pattern for me!  Now that I’m up in Seattle and settling in I’m finally going back and making the corrections.  Handouts for the Shuttlebirds conference are due at the end of the week if I want them to make copies for me so I’m finishing up my last two now.  If I don’t finish by the end of the week it’s no big deal, I’ll just run the copies myself, but I like to have an early deadline and it would be nice to have them all finished.

Does anyone have experience using Illustrator to do diagrams?  I’m having trouble getting nice even (and symmetrical) chains.  What tool do you use to do it and do you have any advice?  I’m seriously considering taking Illustrator and In Design classes as soon as I get more settled in.

Leave a Comment

Tatting with Yarn!

After spending time at the yarn shop this weekend I started experimenting with tatting with yarn.  This is the start of a scarf using an insertion pattern from (where else?) one of the Priscilla Tatting books.  To understand the scale, the book it’s on is the back back cover of my bound print out of Priscilla Tatting book #2.  This is the first of 6 rows.  Originally I’d thought that I’d be making a belt out of pattern, but once I got started it became clear that it would end up being too thick.  So a scarf it is.  The yarn is a Debbie Bliss yarn and it’s a worsted weight cotton.  Finally my large Tatsy shuttles are getting some use!
The pattern thus far is pretty basic.  Both rings and chains are 2(-2)x5 or 5 picots separated by 2 ds.  The next row will be the same, but the rings will interlock at the 2nd and 4th picots.  These first two rows are going to be in white.  The next row on either side will be light purple and then the outer rows will be purple.

I think this will be my main project for the drive up to Seattle.  Hopefully, I’ll have it done by the time I arrive in Washington from sunny California.

Comments (2)

Got a Few Ends to Hide

Well, I’ve made some good progress on the first “real” version of the tea cloth, but most of it was done in the car or on an airplane with just a bit too much movement for trying to sew in ends.  I’ve got a total of 1 done so far….  🙂  I’m making this out of size 50 Flora that I’ve had for a while and I’m pretty happy with the way it’s turning out.
I did hide that one end because I haven’t actually done much sewing in of ends with the smaller sizes and I wanted to make sure it wasn’t going to be too bad.  I still haven’t found a good needle for sewing in size 80.  The finished piece always ends up looking bulky to me, but the 50 seems to be working nicely.  Just need to sit down and do them.  This tea cloth is made up of so many little motifs that I expect the hiding of ends will be the most annoying part of the project, but if I keep on top of them and hide them as I go they shouldn’t be too bad.
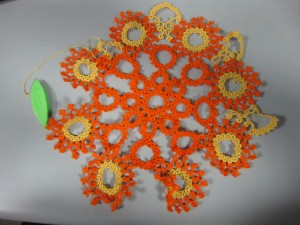
I’m color coding this piece as I go.  Here you can see the start of it as all the 16-ring circles are in white and the 12 ring circles in light purple.  Then I have the other parts mapped out as medium purple, dark purple and black.  Hopefully the whole thing looks good when it’s all put together.

Comments (2)

Just a Few More Half-Circles

I’ve just started a pair for fingerless gloves for Etsy order so that’s going to keep me busy for the next few days.  Afraid that means there’s not much to report here but a bit more progress on the half-circles in the tea cloth. If I get the gloves finished up I’ll probably finish off the half-circles this weekend.  For the most part though I’ll be busy on the fingerless gloves so don’t expect much for the Priscilla books.

I’ll take a picture of the gloves when I’m done. They were requested in a color combination that I haven’t done yet so I’m curious to know how they turn out.  So far, they’re looking good.


Leave a Comment

Half-Circles!

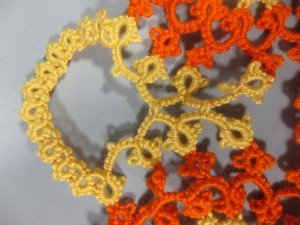
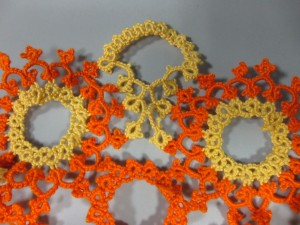
This week I’m getting started on the next part of the tea cloth from Priscilla #2.  This section:  Half-circles.  These half circles are the space fillers between the larger motifs of round 4.  Surprisingly, I didn’t have to make many changes to the pattern as written.  The only difference was that the original pattern called for 4 stitches between the rings of the half circle part and I did 2.  Could be this is because of the changes I made in earlier rows.  Could be just another effect of the smaller joining picots of modern tatting, but it was an easy change and seems to have worked.

7 more of these and then I’ll tackle the oblong motifs that surrond this center part of the tea cloth.  I suspect there will be lots of changes involved in these motifs, mostly because the directions are so vague and incomplete.  Also, it calls for ridiculously long chains between the rings and I just can’t see how that’s going to work.  I’ve started on the next “real” version of the tea cloth, but haven’t really made enough progress for a picture.  Maybe I’ll have something more substantial in the next couple days.  Here’s one more picture of the half circle that better shows their placiment in the piece.

Leave a Comment