First Steps
The first Priscilla book is 33 pages, the second is 43 and the third is 32. Then there’s also the yoke book from Priscilla which is both tatting and crocheting. I don’t have it in front of me so I can’t count up how many pages of tatting it has.
It’s sort of hard to tell how many patterns there are on the 100+ pages without going through very carefully and counting. The books are scanned and the pictures are from the early 1900. A lot of the detail is lost and the division between patterns is shown just with a slightly large bit of text in the middle of a sea of text. Ahh, what I wouldn’t do for a diagrammed pattern.
I have messed around with some of the larger projects before and had them sort of end up as a mess. The patterns an written sometimes don’t match the pictures and even when they do seem to I’ve had trouble getting mine to come out the same or even just flat. It’s probably in the blocking, but I feel like if you need to block a pattern to make it come out flat then you probably need to change the pattern first. Blocking is for finishing, but once a piece is tatted it should have basically the right shape.
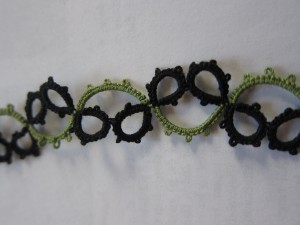
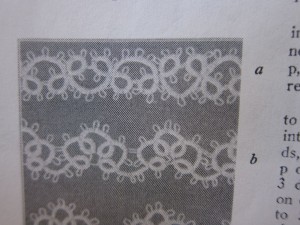 I’m really looking forward to wrestling with those larger patterns, but I wanted to start off with a few of the easier ones first. It was the edgings on pages 7-10 of the 3rd book that made me first notice the Priscilla books so I’m starting with one on page 8, “Figure 24a” or as I’m calling it, the “Leaf Edging” since I think it looks like leaves on a vine.
I decided a bracelet of this pattern would be a good way to finish off a bit of black Lizabeth thread in size 20 that I had left on a shuttle. A magnetic clasp was perfect for it.
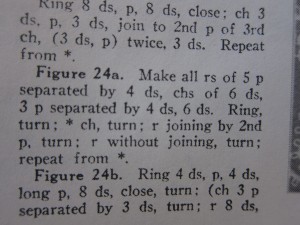
Here’s a picture of the instructions. Nice and easy, right? Written out in the more modern short hand they are:
R 4-4-4-4-4-4
Ch 6-4-4-6
R 4-4+4-4-4-4 (join 2nd picot to 4th picot of last ring)
Shoelace trick (my addition, see note below)
Repeat from the beginning, until you’ve reached the desired length then tie and hide ends.
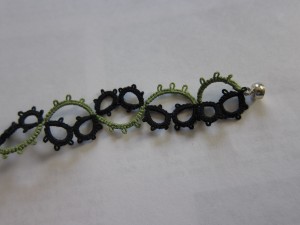 I didn’t think I’d learn much from such a simple looking pattern, but of course, I did. As written the instructions just say “turn” but I quickly found that just turning and working the second ring would simply leave the shuttle and ball threads crossed once I continued. In addition to then giving the piece a front and back it also meant the sections would flip around and not stay in place. This might not matter if you were going to take the finished project and sew it down as an edging, (in fact you might want to have a front and back in that case) but for a bracelet it didn’t work. (See the picture on the right.) a simple shoelace trick before the next ring took care of that and the different sections stay nicely in place now.
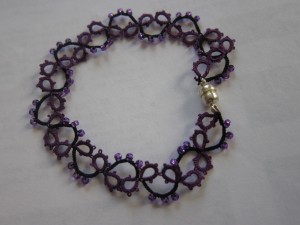 I liked this pattern so much I decided to try it with beads with the last bit of purple thread on a shuttle from an earlier project. It’s hard to tell because the purple is so dark, but the rings are purple and the chains are black with purple beads.
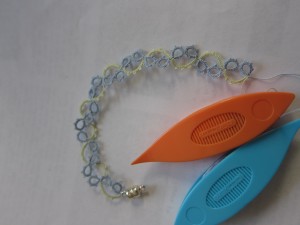
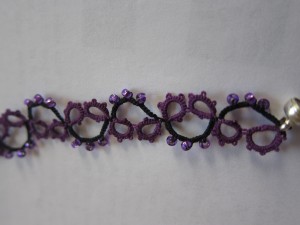 I think this will be a pattern I use a lot. I especially like it as a quick project for finishing off the last bit of thread on a shuttle by using it as the chain color. It doesn’t take much to do a bracelet and if I run out on the shuttle I can switch over to a ball to finish it off. That’s what I’m doing with the third version below. I had just a little bit left of the green (size 80) left on a shuttle and happened to already have the blue wound on another. I think I just might be able to finish it with what’s on the shuttle, but if not I’ll switch to the ball.
With that, I’m 1 pattern down and couple hundred (?) left to go. Stay tuned!

Kelly Said,
January 4, 2011 @ 3:49 pm
I’m so impressed by this project. I’ve only made stabs at tatting from my vintage patterns books, but I keep at it. They’re still a great way to learn how elements can work together.
admin Said,
January 5, 2011 @ 8:01 am
Thanks Kelly! I’m having fun with it. The patterns in the vintage books are so pretty, it seemed a shame to keep avoiding tatting them just because the patterns were difficult to read and the pictures of a lower quality. It always amazes me when I look carefully through my vintage pattern books and find all sorts of techniques that I thought were “new.”
Snapdragon Lace Said,
January 14, 2011 @ 11:08 am
[…] week. To that end I made another of the leaf motif bracelets from book #3 that I wrote about in my first post about the Priscilla project. Seems so long […]