Dye Chips

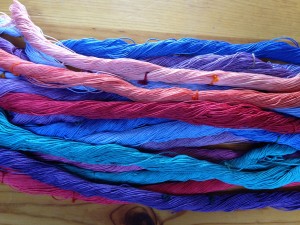
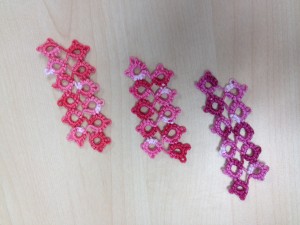
Dyed RedI am slowly working through my dyes to make small samples so that I can have some examples of how the color takes to the thread when I’m picking out what colors I want to use during a dyeing session.  Sort of like paint chips, but with dyed thread.

When I say slowly, I mean that I’ve only got these three in various reds done.  Unfortunately I’ve confused two of them already and can’t remember which one is which.   Dyeing lesson #28.  When making samples, don’t do three baths of the same color all at once.  This weekend I’m planing on picking one blue, one green, one red and one purple and then labeling them as soon as they’re dry.


Comments (2)

photo 4

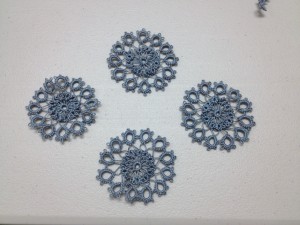
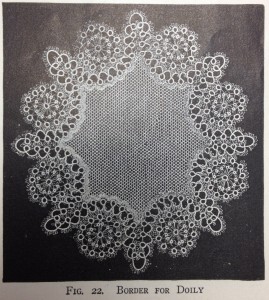
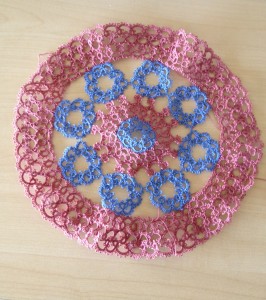
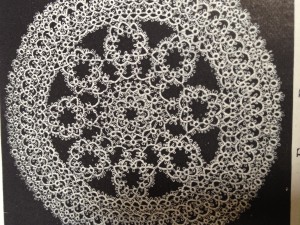
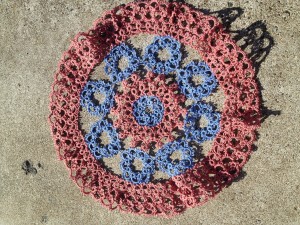
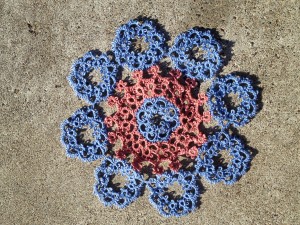
This single-shuttle motif is part of a small doily I’m working on from Priscilla Tatting #1.  I actually really like the way it looks on it’s own.  Which is good, because the next section (where it all gets put together) is proving rather hard to make work.  Why is it hard to make work?  Well, because once again, it seems like the written instructions don’t match with the pictures.  These 4 motifs were done based on the written instructions, but when you look at the pictures you can clearly see that there are more picots on the outer rings.  So I’m going to have to spend a bit of quiet time studying the pictures in the original book and seeing if there’s anything else different.  There’s definitely going to be some modifications made.  I’ll post some pictures when I actually get something that starts to work.  Here’s what it’s ultimately supposed to look like:

Doily

I’m not sure exactly what I’m going to do about the center.  It could be a small enough piece that I’ll actually do the sewing and try to put fabric in the middle.  There are lots of pieces in the Priscilla book that have that and it’s something I’ve never done before so I could use the experience.

Leave a Comment

2014!!!

Sea Breeze

Oh my.  It’s been so long.  So much to talk about.  I’m going to start with a piece shameless self-promotion.  I am now starting to sell hand-dyed threads!  I’ll be ramping up slowly over the next couple months.  I’m getting a new custom-made adjustable swift for making the skeins next month which will help immensely.  In the mean-time I’m winding some of smaller skeins.  I’m excited about the swift because it will let me to make very long skeins so that the color changes can be very long and gradual.  I tend to like the softer changes and so that’s what I’ll be dyeing.

photo 3

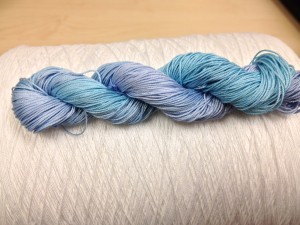
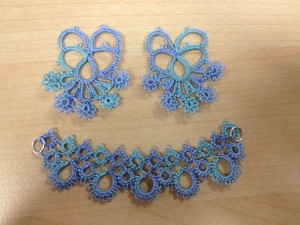
This blue and teal skein is one of a batch of only 4 skeins in Lizbeth size 20.  I love the colors and am excited about the mini-skein I saved for myself for tatting the samples.  I’m calling it Sea Breeze.

I’ll be posting a lot more threads as I make them.  I wound some size 80 and King Tut too, which I’m excited to try soon.  Any color requests?

It’s going to be a while before I have a really good system down.  Because every one of my batches is different and because I want to have a finished tatted sample to show the variations and color changes it my be slow going.  Hopefully the final products come out great.

In other news, I’ve got a new program set-up for diagraming patterns so I’m really getting going on the Priscilla project.  I’m hoping to have a couple patterns all finished out (formatted and everything) by the end of the month.  I went through the books and broke them down into what I think will make good separate volumes.  If I go with that and don’t change anything, it makes for 14 volumes.  This is going to be quite the project!  I’m excited to finally be getting on to the production portion and past the research portion.

In my personal life, I have a new bookkeeping client that’s going to end up being an additional 20 hours a week.  I’ve enjoyed the extra time I’ve had by working part-time between the CPA exams and now, but it was time for me to pick up the hours to take my bookkeeping business up to a full-time job.  I’m determined to keep making progress building a business out of Snapdragon Lace so stay-tuned for more exciting adventures in tatting!


Comments (4)

Threads!

Thread DyeingI picked up some new dye colors and played around with them this week.   Here’s what I ended up with.  They turned out much brighter than the last few batches, which is exactly what I was going for.  I’m very excited about how the orange and teal came out.  Came out with a nice set of different shades of purple as well.  Only catch is that I never seem to use up all the thread I dye.  Guess I know what I’m giving to the tatters on my Christmas list!

Leave a Comment

Doily Draft 8?

Doily Draft 2Just finished going back and redoing those last three rows on the doily.  It is definitely working better, though I’m not sure it’s at 100% yet.  There’s still some ruffling going on.  I’ve put the doily under a stack of textbooks and am hoping that will be enough blocking to make it lay flat.  It’s been pretty crinkled up in my tatting bag for the last week so that probably wasn’t very good for it.

If that works, I’ll continue on with the last row.  Though to be honest, I really think the pattern looks fairly complete now.  The last row is just a double row of rings-only done with a single shuttle and I think it has a bit of a different look than the rest of the doily.  The solidity of the rows I just finished make for a nice finish, I think.  On the right is the picture from the book of the finished piece.  It will be interesting to see how mine turns out!

Doily from book

This was just a test run with some size 10 DMC that I had laying around.  The next step to redoing this pattern from the Priscilla books is to do it once more in Lizbeth (probably size 20) and write out the pattern as I do so.  Then on to playing with my new diagraming program and seeing if I can get it looking nice.


Comments (2)

Snipping Away the Rows

Doily Draft 1


Doily with rows removed.

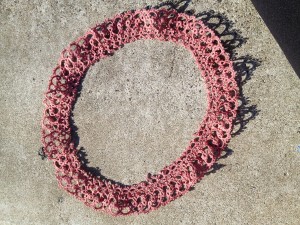
Well.  I got another two rows done on the doily, but I’m not happy with them.  I found the pattern really started to ruffle.  The last two rows were just too big for the inside part of the doily.  I’m not actually surprised by this since I did make changes in the first few rows that made them smaller.   So I snipped off the  last three rows and I’m going to try them again with less repeats of the pattern.  There are 64 rings in the last three rows.  I’m going to eliminate 1/8th of them and bring it down to 56.  That should be enough to get it to lay flat.  At least I sure hope so!


Doily Removed RowsI snipped off the last rows and now I have them laying around.  Not sure what to do with them.  I think I can cut off the first of the three and then the second two will actually make a nice loop.  Not sure what to do with it though.  Maybe put it around a pillow.  Course that means that I have to either find or make a pillow that’s just the right size for it.  Excellent.  More projects to never actually get around to.  🙂

Comments (2)

Update!


Craftsy has a new set up that lets you link to your own pattern store and show pictures of your own patterns on the sidebar.  It’s sort of exciting to see my own patterns on both the Craftsy and the Etsy widgets on the sidebar here.  Makes me feel like I have the startings of a real business!  🙂

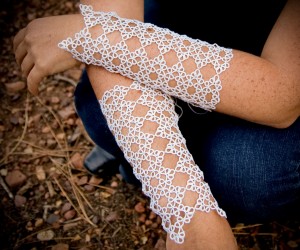
Large White Cuffs-5-5Things have been extremely busy here.  I had three large orders for gloves come in last month as well as a couple other smaller ones.  I’ve finally got them all pretty much out the door now.  Down to just one small one left that I’ll finish up this weekend.  It will be nice to take a few moments and recover.

I had a set of beginner classes at Pacific Fabrics in Northgate the last two weeks.  My students did very well and seem to be excited to do more.  I’m hoping to get my schedule sorted out well enough get some new classes on the calendar.  I also have another beginner class at Bird Tail Beads in Bellevue tomorrow so there are lots of new tatters getting started.  I’m super super excited to be involved with getting people interested and started with tatting!

In other news about learning, I went out to Camp Wannatat in Montana a couple  weeks ago and had a wonderful time (as always) and learned a lot.  I finally got to meet the Shuttle Brothers which was great (they signed my copies of their books) and Reit was there again from Europe.  It was great to see her again as well as everyone else.  It was the 50th Camp Wannatat and the last one to be held at Bobbie’s house so it was a great celebration and I was very honored to be included in it.  Next year they will start to be at an actual camp in Montana.  It’s going to be quite the change, but I’m glad that it will continue and that more people will be able to attend at the bigger venue.

That’s the super quick update.   Things have been busy with the rest of life as well lately, but I’m hoping that things will settle down here in October and I’ll get to work on some of my bigger projects and not just feel like I’m pushing to keep up.


Comments (2)

Tatting with Ribbon

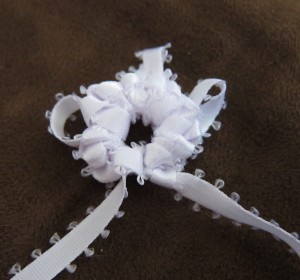
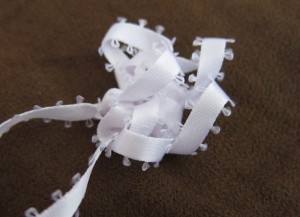
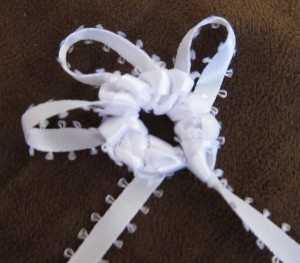
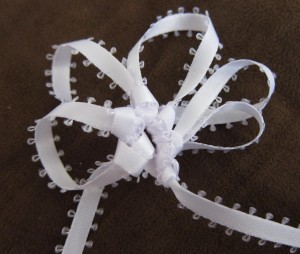
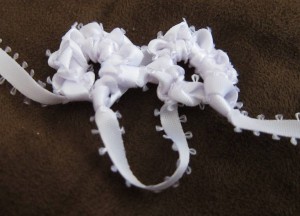
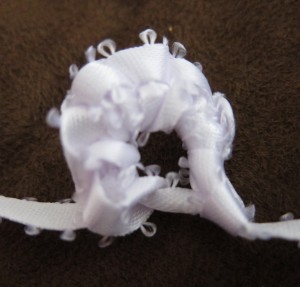
Last year when I was at Camp Wannatat someone (I wish I could remember who) showed us a piece of tatting they’d done with ribbon.  It was a very simple snowflake, but because of the size of the ribbon it came out very big for the pattern.  I took a few minutes yesterday to try it out myself, but mine did NOT come out anywhere nearly as nice. So I wound the entire spool of ribbon (one of the 50 cent spools from Michael’s) on to a Tatsy shuttle and just played around with making simple rings.

I think the reasons it didn’t work as well are probably partly because of my choice of ribbon and partly just because I need more practice.  The ribbon she had used (if I remember right) 3/4 of an inch wide and a smooth cloth.  This one was cloth but much smaller (1/4 of an inch) and with a little picot-like edging.  I thick the picot-like edging made it too busy.  If I were to try it again sometime I’d use an edging-less ribbon in this same size and a larger ribbon as well.  It was an interesting little project and a nice little 30-minute experiment.  I’m not in any rush to starting making much in ribbon at the moment, but I may try it again sometime.  Here’s the rest of all the other little rings I made.

Joins!!!


Leave a Comment

Modern Picots vs. 1909 Picots.

Doily

This weekend I made what is I think the 6th attempt at this doily and it’s finally laying flat.  It’s a pattern from Priscilla Book #1.  It’s not done yet.  There’s another 3 rounds, but I think this version finally works.

To make it work I had to make quite a number of changes to the second round.  That seemed to be the one that was messing everything up.

I did make one other change.  The first, third and the motifs of the 4th round all called for the stitch count to be two and a half stitches in between every picot. I found that to be strange looking and annoying to do, so I made it 2 between them all.  You might say, “Hey, if you go messing with a pattern like that you can’t be surprised when the rest doesn’t work as written.”  In fact, it actually should have helped with the pattern.  The problem I had with the second round was that it was just too small to fit around the first.  Making the first round smaller should have helped with that.

What actually seems to be making the difference is picot size.  In modern day we tend to make our joining picots smaller.  In fact I think we often learn that they are best if they can’t be seen at all.  Back in the early 1900’s it was the exact opposite.  Picots were accented, (I think to make the pieces look more lacy), and joining picots were not done any differently than the others.

One of the reasons why it took me so long (and so many tries) to figure this out was because I was first tatting from my print outs from the Antique Pattern Library.  Either it was the lack of ink in my printer or just the quality of the scan, but I had trouble seeing the picots and how it was joined together.  The instructions were no help as they just tell you to join as shown in the picture.  That’s a pretty common instruction in the books, unfortunately.  It wasn’t until I pulled out my original copy of the 1909 book and looked at the pictures that I could see what was causing the trouble and where the joins should be.

It was actually a very nice reminder of why I’m doing this project of rewriting the patterns from the Priscilla books in the first place.  I really want these patterns to be saved and used and there’s just so many strange things like picot size that make them difficult for modern tatters to figure out.

I have a couple big orders in my Etsy shop to work on this week, so I may not get to this piece until the weekend.  Too bad.  I’m so close now and after having worked so hard on the first couple rounds I’m very excited to finish it.
 

Comments (2)

Close-up!

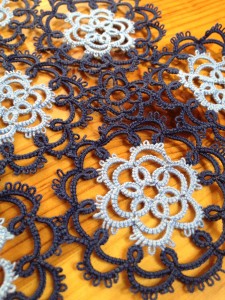
Fair Close up 2I took a picture of a close up of the fair piece so you can see what the motifs look like.  The pattern is from Priscilla Tatting Book #3 (1925).  I like this motif a lot and have made a bunch of pendants out of it it as well.  The final piece was 30 of these motifs and 5 of the smaller one you can see in the middle of this picture.  I made a bunch of extra light blue centers so when I was done with the fair piece I turned these into necklaces, by putting together 3 of them in different arrangements.  Pictures are needed for those too, but I still have to sew in the ends, so I’ll wait to take the pictures until I have that done and I put them on chains in their finished form.


Comments (4)