Start of the First Baby Bonnet
 I’ve just started the first of 6 baby bonnets in the Priscilla books. This one is in book #2. I picked this one because frankly, it looked like it would be the fastest of them. The others looked like they were made from a much smaller thread and for my first bonnet I wanted one that I could do over easily a couple times if I couldn’t get it right.
I’m usually not big on single shuttle tatting or leaving plain threads instead of chains, but for this I think it works. The bonnet is made mostly of a circular motif. (Seems I’ll be learning a lot of different circular motifs during the course of this Priscilla project.)
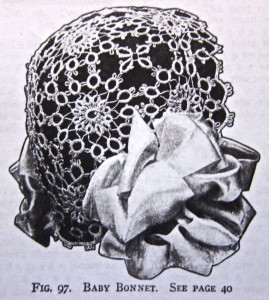
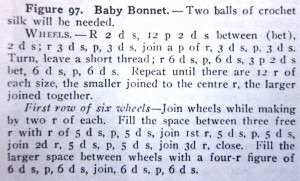
The problem is the book doesn’t actually tell you how many or what size thread to use. The instructions say: “Two balls of crochet silk will be needed.” I’m not sure what size that translates into in modern day, but I’m trying it first in DMC size 10. I picked that size just because it looked like the size in the picture, but having done the first round now I think perhaps I had an adult sized head in mind and not an infants. I’m going to continue with the size 10 though just to see what happens. Also, I think that with some adjustments it could be made into a wedding veil so I want to see what works for an adult-sized head.
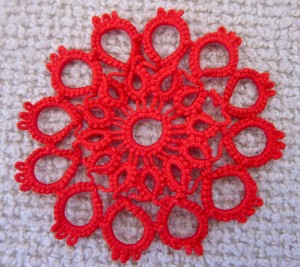
On to the wheel motif. As usual, my main change is to use the continue thread method and climb out from the center ring to the second round. In this case it’s a single shuttle pattern so I use made the first ring about 12 inches from the end of the ring and finger tatted the second half of the split ring that does the climbing out.
Leave at least a 12 inch tail, R 2(-2)x11. Picots should be longer than normal joining picots. (Forgive the the vagueness here. I’m still trying to figure out how long they should be. I think around a quarter of an inch.
Leave mock picot and tat split ring of 3-3/3-3 using the tail for the second half
Leave at least a 1/4 inch thread between all rings. (Sorry again for the vagueness. Still working this out.)
Alternate large and small rings. Join Large Rings to previous Large Ring. Join first picot of Small Rings to previous Small Ring and second picot to the next picot on the center ring.
LR 6-6-2-2-6-6
*SR 3+3+3-3
LR 6+6-2-2-6-6
Repeat from * around center ring. Join last Small Ring to first Small Ring. Join last Large Ring to first Large Ring.
Tie thread to original tail and hide ends.
This is a easy motif that I can do while walking, so hopefully I’ll make fairly quick progress on the bonnet. The next step is figuring out how the pieces fit together and then how (and when) to do the small motifs that fill the negative space.
The big bow on the bonnet in the picture looks nice, but it’s rather annoying since they don’t give very many instructions on how to put together the piece and the bow hides a big chunk of it. They do say the first row is 6 wheels in a row joined by two rings each so I’ll start with that and then see what looks right when I get that far.


Fox Said,
January 25, 2011 @ 3:38 pm
That baby bonnet pattern….? I have one question. Do you have a good therapist?
Fox ; ))
admin Said,
January 25, 2011 @ 5:54 pm
Oh, don’t say that! I sure hope it won’t be THAT bad…
Sue Said,
January 26, 2011 @ 9:41 am
Your motif looks great! 🙂